Friday, 30 December 2011

New Popular Post for Blogger With Animation


This script very easy to install, you only have to put the script to the new Gadget

Login to Blogger Dashboard and navigate to DesignPage Elements
Click “Add Gadget” and Choose “Popular Posts”, Customize the gadget with more than 4 popular post will show–> “Display Up to” … Posts


(If you already have this gadget skip this step)
After you have Popular Post Gadget “Add Gadget” again and select “HTML/Javascript
Put all script bellow to the “Content” of HTML/Javascript Gadget
Done- your popular post now with animation


<style type="text/css" media="screen">

#PopularPosts1 {
 overflow:hidden;
margin-top:5px;
padding:0px 0px;
height:400px;

}

#PopularPosts1 ul {
width:220px;
overflow:hidden;
list-style-type: none;
padding: 0px 0px;
margin:0px 0px;
}

#PopularPosts1 li {
 width:208px;
padding: 5px 5px;
margin:0px 0px 5px 0px;
list-style-type:none;
float:none;
height:80px;
overflow: hidden;
background:#fff url(http://i879.photobucket.com/albums/ab351/bloggerblogimage/blogger/post.jpg) repeat-x;
border:1px solid #ddd;
}

#PopularPosts1 li .item-title {
    color:#A5A9AB;
    font-size:1em;
    margin-bottom:0.5em;
}

#PopularPosts1 li .item-title a {
 text-decoration:none;
color:#4B545B;
font-size:11px;
height:18px;
overflow:hidden;
margin:0px 0px;
padding:0px 0px 2px 0px;
}

#PopularPosts1 li img {
 float:left;
margin-right:5px;
background:#EFEFEF;
border:0;
}

#PopularPosts1 li .item-snippet {
  overflow:hidden;
font-family:Tahoma,Arial,verdana, sans-serif;
font-size:10px;
color:#262B2F;
padding:0px 0px;
margin:0px 0px;
}

#PopularPosts1 .item-snippet a,
#PopularPosts1 .item-snippet a:visited {
    color:#3E4548;
    text-decoration: none;
}

#PopularPosts1 .spyWrapper {
    height: 100%;
    overflow: hidden;
    position: relative;
}

#PopularPosts1 {
 -webkit-border-radius: 5px;
 -moz-border-radius: 5px;
}

.tags span,
.tags a {
 -webkit-border-radius: 8px;
 -moz-border-radius: 8px;
}

a img {
    border: 0;
}

-->
</style>
<script src="http://ajax.googleapis.com/ajax/libs/jquery/1.6.2/jquery.min.js" type="text/javascript"></script>
<script type="text/javascript" charset="utf-8">
$(function () {
    $('.popular-posts ul').simpleSpy();
});
</script>
<script src="http://accordion-for-blogger.googlecode.com/svn/trunk/simplespy.js" type="text/javascript"></script>

Now    your "HTMl JavaScript" You are done.

Wednesday, 28 December 2011

How To Add Energy Saving Mode For Your Blogger


1.Login to your blogger dashboard--> Design- -> Edit HTML

2.Scroll down to where you see </head> tag .

3.Copy below code and paste it just before the </head> tag .

<script language='javascript' src='http://www.onlineleaf.com/savetheenvironment.js' type='text/javascript'/>


Click on Save template.

5.now go your blogger dashboard and go to Desing --&-- Page Elements.

6.Click on 'Add a Gadget' on the sidebar.

7.Select 'HTML/Javascript' and add the one of code given below

<script language="javascript" type="text/javascript" src="http://www.onlineleaf.com/savetheenvironment.js?time=120"></script>


te: Replace ?time=120 with the number of seconds you would like to define the time interval.which will set the time of inactivity to 2 minutes (120 seconds)


8.Now    your "HTMl JavaScript" You are done..

Monday, 26 December 2011

The Top 3 Paid to Affiliate Websites


As we know, now blog not only for online diary. But, blog can be place to make money online. There are many kinds of online bussiness, for example  Pay per Click (PPC), Paid to Review (PTR), Paid to Affiliate (PTA), and so on. As the name, in PTA you can earn much money by become an affiliate (member of an affiliate program) and "sell" a product or other services to your blog visitors. Then if your blog visitors make a purchase, you will get a certain amount of commission. The commission is 4% to 15% from the purchase. So, if your visitor buy a MP3 for $500, you can earn up to $75 from one purchase! So, it's easy right? If you want know the websites that provide affliate program, I wil give you the list of  The Top 3 Paid to Affiliate Websites.


  • Amazon Associates

    Amazon give you chance for you to be an affiliate and promote some products and services in Amazon.com in your blog. The products of Amazone are books, e-books, games, MP3, etc.

  • ClickBank
    ClickBank is the biggest "market" of online digital products and you can promote thousands of popular digital products everyday. If you become an affiliate in ClicBank, you can connect your blog topics with ClickBank products, and you will get many advantages.

  • Commission Junction
    Commission Junction give you chance to maximize your blog to be an affiliate and "sell" Commission Junction products on your blog. With diverse product choices, you can choose your own products that you want to promote on your blog.


In affiliate program, you should have a skill to convince your visitors to buy the product from you. So, you should talk smartly with your blog visitors.  :)

Thursday, 22 December 2011

The Top 5 Paid to Review Websites


Do you know, what is Paid to Review (PTR). PTR is a kind of making money online. The rule is very easy, you only write an article based on the advertiser order, then the advertiser will measure your article and you will get money. Easy right? So, I think, Paid to Review is the best way to make money online. How not? Only by wrote on our blog that based advertisers order, we can get $5-$500 per post!

Usually PTR websites use PayPal. Why? Because, you can transfer your money to local bank easily. Actually, there are many PTR websites with different fee. So, I will share to you about, top 5 paid to review websites.


  • www.reviewme.com
  • www.blogsvertise.com
  • www.sponsoredreviews.com
  • www.buyblogreviews.com
  • www.lodlaunch.com
Just grab your keyboard and earn much money! 

Tuesday, 20 December 2011

How to Spy Another Blog


Did you ever think, How many visitors are my friend's blog a day? Whereas, your friend's blog isn't using visitor counter such as hitstats, geocounter, etc. But, now you can spy your friend's blog by using CheckSiteTraffic.comThis website give you chance to spy your friend's blogs as many you want. Still in this website, you can spy some informations about a blog such as:

  • Website Title
  • Website Description
  • Categories
  • Traffic Data
  • Alexa Rank Trend
  • Google Trend
  • Server Information
  • Server Physical Location
  • Contact Information
  • Whois Domain Information
So many right? Now, if you want to know How to Spy Another Blog, just follow the steps below


1. Go to CheckSiteTraffic.com
2. Enter a blog address, and click Spy!

3. Then you can see the blog informations

Sunday, 18 December 2011

Text Hover Effect with Shadow


We know what is link hover. So, text hover is almost same with link hover. The difference only, if link hover has a web address, but if text hover doesn't have a web address. Actually the trick of Text Hover Effect with Shadow is very simple. Try to put your mouse on the text below.

Full Blog Tricks provides many blogger tricks, blogger hacks, and blogger widgets. We also give you many SEO tips to increase your blog performance in Search Engine.

To make this text hover, you just need the script below.


<style type="text/css">
#rachmath:hover .rachma, #rachmath.hover_effect .rachma {text-shadow: 0 0 10px #000}
</style>
<div id="rachmath">
<div class="rachma" id="rachmath">
WRITE YOUR TEXT HERE
</div>
</div>


Customize :
#000 is the color of the shadow, you can change the color.
WRITE YOUR TEXT HERE is the place where you can put your text

Click  
Finish! Simple right?

Friday, 16 December 2011

Change Blog Background Become Fire


 Previously, I've posted about Change Blog Background Become Matrix Style . Now, I will posted about  Change Blog Background Become Fire. This trick is proper for blog which has topic about automotive. But if your blog has black background, that's also proper for fire background. OK shortly, if you want to know how to Change Blog Background Become Fire, just follow the steps below.

1. Log in to your blogger account
2. Go to Design Page Elements --> Add Gadget
3. Choose "HTML/Java Script"
4. Add the code below

5. Now, you can click SAVE

Wednesday, 14 December 2011

Change Blog Background Become Matrix Style

  Hi, friends! Now, I wil post about Change Blog Background Become Matrix Style. Have you watch Matrix? I think you have. Because Matrix is a big movie. Even this movie can enter into Box Office and earned $742,128,461! Amazing! So, if you like Matrix, by learn this trick, you can try to change your blog background become Matrix style. Interseted? Just follow the steps below.

1. Log in to your blogger account
2. Go to Design --> Page Elements --> Add Gadget
3. Choose "HTML/Java Script"
4. Add the code below

 You can change the matrix style with other image, for example
http://1.bp.blogspot.com/-tSfSsH65WZQ/TcJhgd58YWI/AAAAAAAAAYA/Ahbme-7fRzc/s1600/Matrixl.gif

5. Now, you can click SAVE

Monday, 12 December 2011

Add Flying Balloon


Hi, Blogger Lovers! If in the previous post I share to you about how to add flying bat, now i will teach you about how to add flying balloon. If we see balloon, we will remember about our childhood. Childhood was always identified with balloon. So if we put balloon on our blog, we will always remember about our childhood. And, if you want to learn this trick, i will share to you how to add it on our blog. Just follow the sreps below :


1. Log in to your Blogger Account
2. Go to Design>>>Page Elements>>>Add Gadget
3. Choose HTML/Java Script, and then copy and paste the code below :
4. Save it

Sunday, 11 December 2011

Add Flying Butterfly

Have you ever to seen a blog that decorated by flying butterfly. Maybe you think that's very beautiful (But I don't think so). So if you think like me, don't try this trick. Ok, ok serious! That was only for not too strained. Ok if you want to learn this trick, i gave you many choice and you only follow the steps below

1. Log in to your Blogger Account
2. Go to Design>>>Page Elements>>>Add Gadget
3. Choose HTML/Java Script, copy and paste your butterfly code choice.


4. Click Save and see the change :p

Saturday, 10 December 2011

Add Flying Bat

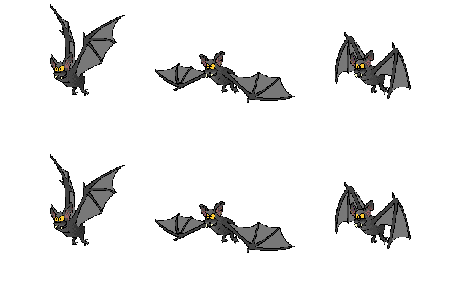
Do you like a bat? Bat is an animal that can fly. In movies bat often played a vampire. But i will not discuss about bat. In this trick you can add flying bat into your blog. So your blog will be scary, because some bats fly on your blog. Your blog become the world night! OK I will fastly if you happy with this trick, just follow the steps below


1. Log in to your blogger account
2. Go to Design>>>Page Elements>>>Add Gadget
3. Choose HTML/Java Script, and then copy and paste the code below


4. Save and see your night blog!

Friday, 9 December 2011

Star Effect On the Cursor - Effect

I found a new trick. This tricks is work if you move the cursor, so the cursor will drop a lot of stars. So you can see falling star in your blog, and your blog will be sparkle. OK if you think this trick is nice, just follow the steps below

1. Log in to your Blogger  Account
2. Go to Design>>>Edit HTML
3. Find code : </body> (If you want to faster : F3)
4. Copy and paste the code below AFTER that

<script src="http://calvinalx.googlepages.com/Sparkle.js" type="text/javascript"></script><br /> <script language="JavaScript" type="text/javascript">var colour="white";</script>


5. Save and then see your sparkle blog!

Thursday, 8 December 2011

How to Edit Blogger Favicon


Did you know? Blogger just release a new feature. What is that? Favicon Editor! Yups.. the function is for how to Edit Blogger Favicon. I think it's very nice feature. We just need little steps to edit our blog favicon. But, where is Favicon Editor place? You can find on Design --> Page Elements.


Then, how to add the favicon? You just click "Edit" on Favicon menu. The, you can upload you favicon file (a file with .ico). Just share some tips, you can get a file with .ico in  http://www.favicongenerator.com/Firstly, upload you picture, and FaviconGenerator will be generate into .ico. So, we just waiting what is FreeBloggerTriks next update :P

Tuesday, 6 December 2011

How to add Social Networking Buttons Below Every Post - New


By adding social networking icons to your blog you will definitely boost your blog's traffic, if done properly. So be careful while placing them. They should be attractive, correctly placed, aligned and also they should be visible separately from the post. Although buttons like AddThis and AddToAny are quite useful, but now they look quite outdated.

So have a look on these buttons:
Download buttons from here
Or from here [Free Icons Download]
Or From here [Glossy Buttons]


To show these icons below all your posts and to dynamically synchronize the post's address with each of these buttons, follow these steps:

Go to "Layout" section, then click on "Edit HTML" link.
Then click on "Expand Widget Templates". Now find (CTRL+F) this code:

<data:post.body/>

Then immediately after that code, add these lines:


<!--SOCIAL-BOOKMARKING-ICONS-STARTS-->
<b:if cond='data:blog.pageType == "item"'>
<!--DIGG-->
<a expr:href='&quot; http://digg.com/submit?url=&quot; + data:post.url + &quot;&amp;title=&quot; + data:post.title' target='_blank'><img alt='Digg It!' src=' ' /></a>
<!--Stumble-->
<a expr:href='&quot;http://www.stumbleupon.com/submit?url=&quot; + data:post.url + &quot;&amp;title=&quot; + data:post.title' rel='external nofollow' target='_blank'><img alt='Stumble' src=' '/></a>
<!--Delicious-->
<a expr:href='&quot;http://del.icio.us/post?url=&quot; + data:post.url + &quot;&amp;title=&quot; + data:post.title' rel='external nofollow' target='_blank'><img alt='Delicious' src=' '/></a>
<!--Technorati-->
<a expr:href='&quot;http://technorati.com/faves?add=&quot; + data:post.url' rel='external nofollow' target='_blank'><img alt='Technorati' src=' '/></a>
<!--Twitter-->
<a expr:href='&quot;http://twitter.com/home/?status=Chk Out-&quot; + data:post.title + &quot; &quot; + data:post.url' target='_blank'><img alt='Tweet It!' src=' ' width='122'/></a>
<!--Facebook-->
<a expr:href='&quot;http://www.facebook.com/sharer.php?u=&quot; + data:post.url + &quot;&amp;t=&quot; + data:post.title' rel='external nofollow' target='_blank'><img alt='Facebook' src=' '/></a></b:if>
<!--SOCIAL-BOOKMARKING-ICONS-STOPS-4-Help-http://bloggerstop.net-->


In the highlighted code (in red color), paste the DIRECT LINKS to the various social networking icons.
The black bolded code hides these icons in your Home-Page and only shows them below your posts.

Monday, 5 December 2011

9+ Reasons Why you should buy a Custom Domain For Blogger

We all take the first step in initiating some work or business but as we move on we often make many mistakes unwillingly. Most bloggers start their blogging careers by signing up for a free blog hosting Content management system like Blogger.com but most of them don't realize the disadvantages of using a subdomain.
When you start blogging with free sub domains. All people that know you get familiar with your blog through that subdomain. As time goes on your rankings increase and you attract a handsome traffic then you realize that you are not receiving sponsorship and neither are you earning. But when you finally decide to purchase a custom domain you get confused with several questions in mind. You start thinking whether or not you will loose your rankings, PageRank , Alexa etc. So to answer all these questions carefully read the following reasons that tell you why should you buy a custom domain as soon as possible.


1. Reputation in Blogosphere

Blogs with .com domain are naturally respected more than blogs with sub domains such as .Blogspot.com. Link exchange with niche blogs or expanding your blogging circle is only possible when you join the .com club
Its feels really great when you share your Blog URL with your friends and family as opposed to the embarrassing lengthy BlogSpot domain

2. Most Advertising services do not accept subdomains

Services like buysellads do not accept subdomains which means that you are loosing 50% of revenue potential.

3. Fans & Subscribers Increase with Custom domains

People will follow you only when they know you offer something they don't have. But when they realize that you using a .blogspot.com domain, they will take a not-so-good impression of your content and would not bother following someone who is himself a free Resource user. Most people take .com or .org domains as commercial websites ran by teams or group of people and often subscribe them and follow them via Twitter, Facebook or Google friend connect. The reason is simple your domain is enough evidence that you are taking your work serious by spending some money on the service that you use and you are not just another free monger.

4. People Will Share and Bookmark Your blog posts


After giving a first good impression, people then happily share your post with friends and family. They will confidently bookmark it and visit it often to gain more knowledge because they know the work comes from an authority. This is one reason why subdomains do not play well on social networks whilst blogs with custom domains get fair amount of traffic from networks such as Stumbleupon, Digg, Facebook and Twitter.

5. PageRank increase slowly With Subdomains

Using a blogspot domain means that the chances of getting more backlinks is minimum for you. I personally don't link subdomains because often these blogs are created on temporary basis and once they are deleted the link on our blog becomes a dead/broken link which can effect our blog ranking. Therefore web owners prefer not to link them and even if they link such blogs, you will always find a nofollow tag attached to it.

6. You just need to buy a domain and not the Hosting


When you purchase a domain for your blogger blog, you then don't need to do anything else. Just sit back and relax. Fortunately Blogger hosts all your blog posts for free at its server contrary to what Wordpress does. That's one of the biggest reasons why people like me prefer blogger over Wordpress.

7. Rankings will Speedup


As more and more people notice your blog and bookmark and share it, your ranking on SERPs which is search engine results page will increase. the more Diggs, Stumbles and Likes you receive the better you go higher but all these social favour is possible only when you own your branded domain and not a free one which discourages readership and content sharing.

8. PageRank will stabilize On next PR update


Most people having PageRank greater than 2 often don't go for domain change because they fear that they will loose their PageRank. No doubt its true but you loose it only at temporary basis. Once Google robots locate all your redirected links, your rankings will be granted back to you on next PageRank update. My PR dropped to zero from 2 when I changed my domain but just after three months on next PR update cycle I got back the rank I owned.

9. You can Grow your business


Once your blog attracts traffic and readership, you can then offer guest posting, product reviews, sale banners, and earn day and night. Sponsors will advertise at platforms where they find quality traffic. Subdomain holders are always underestimated even if they have a plausible traffic strength.


You just need some hard work at initial stage and then work online will be no less than a fun. Happy blogging buddies. :))
You must be thinking how to buy a domain?

Sunday, 4 December 2011

How To Add Falling Love On Blog -HOT


Have you ever falling in love to someone? I know, most of you ever fallin in love to someone. Therefore, I will teach you how to add many falling love on your blog. How? You just follow the steps below

1. Log in to your blogger account
2. Go to Design>>>Page Elements>>>Add Gadget
3. Choose HTML/Java Script, then copy and paste the code below


<script src='http://anas.ku93.googlepages.com/lovingheart.js'> </script>


4. Click Save !!
    done

Saturday, 3 December 2011

How to Add Related Posts on Sidebar


Hi, friends! Advance, I've written some tricks about related posts. They're How To Make Related Article In Blog and How to Add Related Posts with Thumbnail. Then, what will we disquss now? That's How to Add Related Posts on Sidebar. Actually the function are similar with them. But, in this case the related posts are in sidebar. So, it can contain more articles and have a good look. Now, How to Add Related Posts on Sidebar? Just follow the steps below!

1. Log in to your blogger account
2. Go to Design --> Edit HTML
3. Backup first your template, because we'll make some changes.
4. Click on "Expand Widget Templates"
5. Copy and paste the code below above </head>


<script type="text/javascript">
//<![CDATA[
var relatedTitles = new Array();
var relatedTitlesNum = 0;
var relatedUrls = new Array();
function related_results_labels(json) {
for (var i = 0; i < json.feed.entry.length; i++) {
var entry = json.feed.entry[i];
relatedTitles[relatedTitlesNum] = entry.title.$t;
for (var k = 0; k < entry.link.length; k++) {
if (entry.link[k].rel == 'alternate') {
relatedUrls[relatedTitlesNum] = entry.link[k].href;
relatedTitlesNum++;
break;
}
}
}
}
function removeRelatedDuplicates() {
var tmp = new Array(0);
var tmp2 = new Array(0);
for(var i = 0; i < relatedUrls.length; i++) {
if(!contains(tmp, relatedUrls[i])) {
tmp.length += 1;
tmp[tmp.length - 1] = relatedUrls[i];
tmp2.length += 1;
tmp2[tmp2.length - 1] = relatedTitles[i];
}
}
relatedTitles = tmp2;
relatedUrls = tmp;
}
function contains(a, e) {
for(var j = 0; j < a.length; j++) if (a[j]==e) return true;
return false;
}
function printRelatedLabels() {
var r = Math.floor((relatedTitles.length - 1) * Math.random());
var i = 0;
document.write('<ul>');
while (i < relatedTitles.length && i < 20) {
document.write('<li><a href="' + relatedUrls[r] + '">' + relatedTitles[r] + '</a></li>');
if (r < relatedTitles.length - 1) {
r++;
} else {
r = 0;
}
i++;
}
document.write('</ul>');
}
//]]>
</script>


6. Find (Ctrl + F) some code which looks like this


<b:if cond='data:post.labels'>
<data:postLabelsLabel/>
<b:loop values='data:post.labels' var='label'>
<a expr:href='data:label.url' rel='tag'><data:label.name/></a><b:if cond='data:label.isLast != &quot;true&quot;'>,</b:if>
</b:loop>
</b:if>


7. Then change with this code

<b:if cond='data:post.labels'><data:postLabelsLabel/>
<b:loop values='data:post.labels' var='label'>
<a expr:href='data:label.url' rel='tag'><data:label.name/></a><b:if cond='data:label.isLast != &quot;true&quot;'>,</b:if>
<b:if cond='data:blog.pageType == &quot;item&quot;'>
<script expr:src='&quot;/feeds/posts/default/-/&quot; + data:label.name + &quot;?alt=json-in-script&amp;callback=related_results_labels&amp;max-results=10&quot;' type='text/javascript'/>
</b:if>
</b:loop>
</b:if>


Customize:
max-results=10 is the number of related posts will be display, you can change the number.

8.Click SAVE TEMPLATE
9. Then, go to Design --> Page Elements --> Add Gadget, then choose "HTML/Java Script". Add the code below.


<script type="text/javascript">
removeRelatedDuplicates();
printRelatedLabels();
</script>


10. Write Related Posts as the name of the widget. Click SAVE  if you finished
11. To show the widget only in next page (not in homepage), go back to Design --> Edit HTML, click on "Expand Widget Templates"
12. Find (Ctrl + F) Related Posts,  and add some blue code. So the code will be like this


<b:widget id='HTML7' locked='false' title='Related Posts' type='HTML'>
<b:includable id='main'>

<b:if cond='data:blog.pageType == &quot;item&quot;'>

<!-- only display title if it's non-empty -->
<b:if cond='data:title != &quot;&quot;'>
<h2 class='title'><data:title/></h2>
</b:if>
<div class='widget-content'>
<data:content/>
</div>

<b:include name='quickedit'/>

</b:if>

</b:includable>
</b:widget>


15. Click SAVE TEMPLATE
OK done!
Related Posts Plugin for WordPress, Blogger...
;